Showing posts with label portrait. Show all posts

Friday, March 26, 2010

My Edited Digital Fine Art Photographs

All of my photographs were edited using the DAM software 'Lightroom 2.0'.
To achieve these looks I used and experimented with the features below, found within the develop section of 'Lightroom':
  • Cropping
  • Graduated Filter
  • Highlight Recovery
  • Dust Spot Remover
  • Black Clipping
  • Contrast
  • Sharpening
  • Vignette Amount

I did originally choose the two pictures above as part of my final edited shots however after having a second judgement I decided to further crop the images to give a more personal and tight composition, thus bringing the viewer's eye to the main relationship shown within the photograph of working mother and her daughter, cropping unnecessary space at the bottom of the photographs.


I am really pleased with the outcome of the shoot and especially in the ways in which I have captured the relationship of working mother and daughter. I enjoyed the whole studio experience and feel this may be an area in which I wish to continue to pursue my creative photography throughout and after my degree course.

Tuesday, March 23, 2010

Fine Art / Corporate Portraits

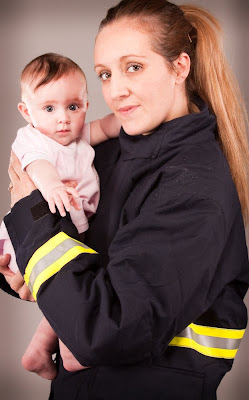
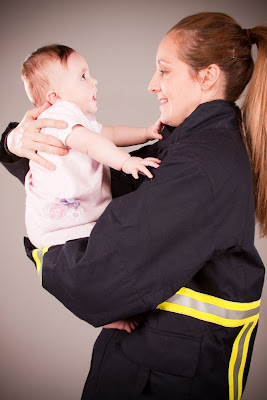
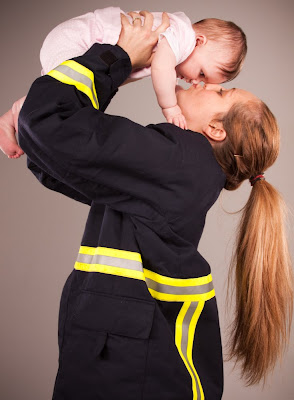
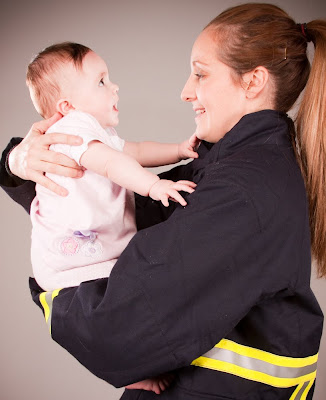
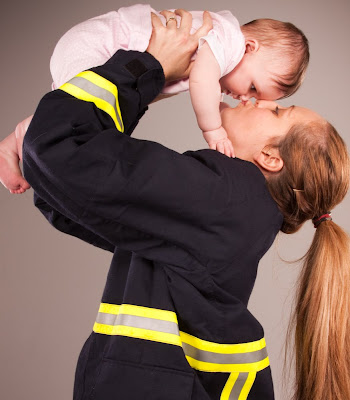
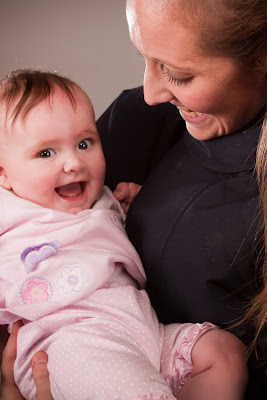
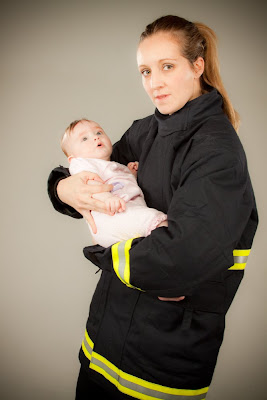
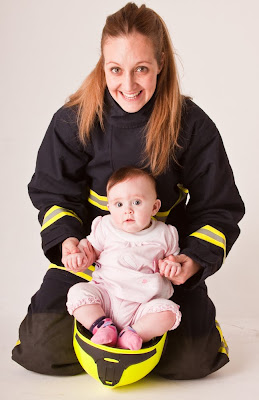
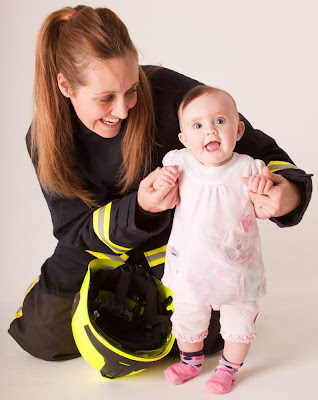
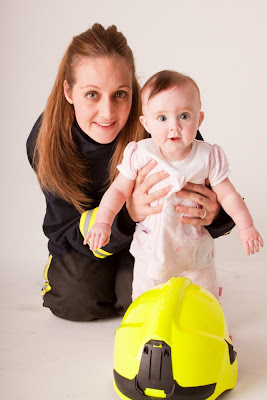
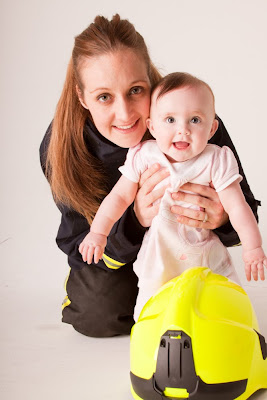
It is my intention tomorrow to welcome a close friend of mine Natalie, her 3yr old son Oliver and her 5 month old baby Gracie, into the studio who have kindly volunteered to be photographed in a style of my choice. Being aware of my brief I plan to photograph Nat within a corporate portrait theme with her posing in her Fire Brigade uniform. I also plan to convey a message through incorporating her son and daughter into the shoot, so I am not only capturing her standing proud through her career achievements but also through a personal insight to her life through juggling her demanding role within the fire brigade as well as being a dedicated and loving mother to her children!

Below are some images of some fire women I found via the use of Google Images to give me some further inspiration to my already thought out idea. The first image I came across which caught my attention was photographed by 'bamboquiri' - http://www.flickr.com/photos/bamboquiri/ to see the rest of his stunning images please use the web address above or below his photograph to access his Flickr account.


http://i123.photobucket.com/albums/o308/duane_2007/004.jpg


http://www.911gifts.biz/images/g1_09.jpg


As I will also be trying to achieve a personal, intimate, family approach by means of including her children to some of the overall photographs, I again have searched via Google images 'mother and child' and below are some of the images which I found to give me the most inspiration.

Below are the art work paintings of Gustav Klint whose fascinating paintings below incorporate abstract patterns with the real resemblance of a mother and child. Maybe it is possible that the way in which photographers choose to photograph this type of subject 'mother and child' has been through the influences of such works like Klint's or his influenced predecessors, such as Leonardo Di Vinci perhaps!


http://www.umcwy.info/uploadedimages/Additional_Services/Women_and_Children/wc_


http://www.whyoga.com/assets/images/classes_portraits/Mother-and-baby.jpg

Another great influence in regards to portrait photography is the 19th Century portrait photographer Julia Margaret Cameron who embellished in photographing portraits that depicted the emotional state of her sitter rather than paying attention to the mastering of perfect accuracy of sharp detail within her photographs. She uses strategic codes and symbols to show the sitters individuality, their status and personality.


http://www.westbynorthwest.org/winter01/mary.motherandchild.jpg


http://www.imageandnarrative.be/painting/images/fulya01.jpg

Most of Cameron's photographs have a spiritual sensibility, and are peaceful and romantic. The mood is sombre and contemplative. She did not photograph action or care much about backgrounds. It was the essence of the subject that motivated Cameron's photography. (Jody Zellen)

http://www.victoriaspast.com/JuiliaMCameron/The%20Kiss%20of%20Peace%201869.jpg


http://www.victoriaspast.com/JuiliaMCameron/A%20Study%20of%20the%20Cenci-May%201868

http://www.victoriaspast.com/JuiliaMCameron/Julia%20Jackson%201867.jpg


Artwork


Wednesday, March 3, 2010

Portrait Lighting Class Workshop

In today's lecture Mr F gave some insight into how to achieve a certain portrait look via the set up of lights within the studio. Firstly we looked at the photography of Jill Greenberg whose fine art portraits display a halo of light around the sitter. http://www.manipulator.com/

Like above the majority of Greenburg's images are of small children but they have not been photographed as children are usually seen as being happy and carefree but whilst they are showing a state of upset, pain or unhappiness. Yet still due to the way Greenburg has portrayed them through her clever and powerful lighting technique this shows the viewer a powerful message of being beautiful through their innocence even through a state of distress. The halo of light for me symbolizes that they are but angels through happiness or sadness brought upon them in the world.


The above photograph of Gwen Stefani is definately one of my favourite images of Greenberg. Taking the photograph from a lower angel to the sitter has given Gwen a majestic value of importance. The lighting used giving a full halo of light around her body conveys a message that she is a beautiful goddess. This type of image reminds me of the work of David Lachapelle due to the bright and detailed colours within the final image, although Greenberg's photographs are much more of a tamer nature compared to the very expressive, energetic and fascinating works of one of my most loved photographic artists Mr LaChapelle.

http://www.lachapellestudio.com


So to achieve a 'halo look' we set up the studio with the use of five lights, the main key light being the raised Beauty dish pointed down onto the sitter (which was one of our fellow student's Mark) and four surrounding lights around Mark - two with honeycomb masks both at 45 degree angles behind Mark and another two at 45 degree angles in front of mark - thus creating a cross lighting effect.


The two lights at the back of Mark were of a wattage of 250 (GM250) where the two lights at the front of Mark were of a higher wattage of 500 (GM500).
The meter reading taken from the highlight shining from Marks ear from the back lights gave F11.5 at a shutter speed of 1/125 and from the front of his face from the front lights gave a reading of F8.5 at a shutter speed of 1/125 - ISO 200.

Therefore compensating the difference between the readings we took the following photographs using a aperture of F11, shutter speed 1/125 at ISO 200.

As you can see the halo of light is showing around marks face shot on the FLASH White Balance however to achieve a cooler colour look we set our colour balance to K4000 to add the bluish tint seen in Greenberg's images. The below image was shot using White Fluorescent light balance (Approx 4000K). I found using this white balance gave Marks skin tone an unnatural look like the overall image had a bluish/purplish tint!

I therefore manually set my white balance to 4000K which gave a much more pleasing and natural look to the final image


Within our second sequence of shots we did not use the front two 45 degree lights and re-metered from the above key light which again after compensating gave a reading of F11 at 1/125.
WB Flash
"Strike a Pose" - Really like this shot and definitely prefer just shooting with the use of the above and two front 45 degree lights !
F16 @ 1/125 WB Flash
From F-Stopping up 1 (allowing less light to pass via the aperture) you can see the different mood created, showing very little highlights apart from a the slight few on Mark's face.

F11 @ 1/125 WB Fluorescent
"Almost angelic"

Our third sequence of shots where taking with the use of the top light only of which the effects of the halo lighting are very minimal compared to using all or part of the set up as shown in the diagram picture above


Within the 2nd part of the workshop we experimented with different angles of view photographing Natalie with the use of continuous lighting with one 45/45 degree light above head height. Setting our DSLR camera's to shoot in monochrome only!